
This 68"x68" quilt went amazingly fast! It looks complicated, but it really is as easy as setting in block patterns. I have digitized all of the fill into the patterns. It can be made larger or smaller by either adjusting the pattern sizes or adding or removing blocks. Below are a few tips on how I quilted this one on my Statler Stitcher Optimum. Instructions are included with the pattern set for fabric cutting sizes, etc. I used Quilters Dream 80/20 as a base layer and Hobbs Wool on the top batting layer to give the illusion of trapunto. Michael Miller wide fabric was used top and bottom.
Once your quilt is loaded, baste as shown in the basting layout below. 16 inches apart on the blocks and 10 for the border area. My basting stitches were about an inch apart so they can be removed easily.

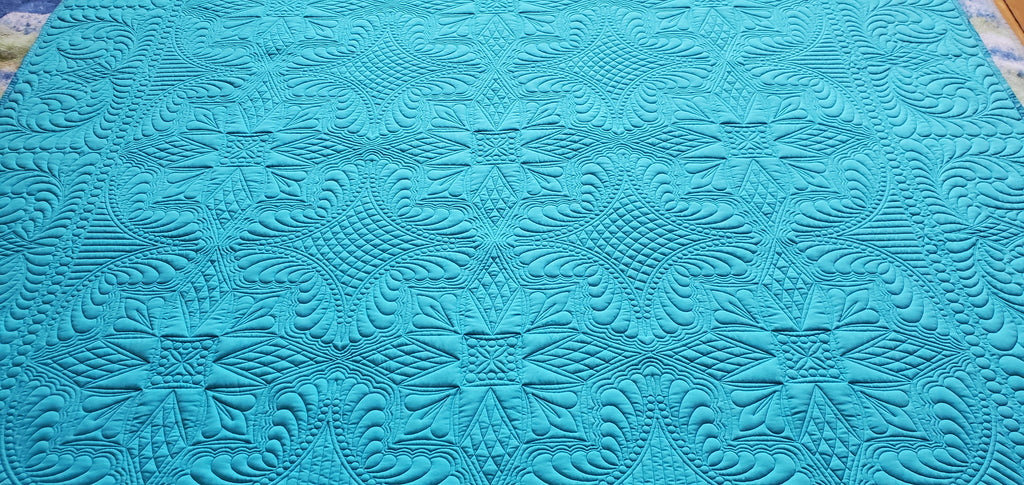
Your quilt should now look like this. (I chose to baste where the smaller inner border was, you do not have to do this.)

Now you can start adding the star blocks to the middle using your basted 16" squares. Use zero margin, you want the star tips to touch.

Be sure to make sure that your star "points" line up with the other blocks by using a boundary to show where the previous blocks are stitched.

After your 9 blocks are stitched, roll back to top of quilt. Remove the inner border basting threads (top and bobbin) from first section. Use point to point line to stitch inner border boundaries. Use tips of star blocks to click points. Use a ruler to find corners. Stitch the second line one inch away from inner line. Continue down the quilt until all inner border lines are stitched.


Stitch the outer "setting" blocks next. (3406B abd 3406C) (Shown in pink below) The piano key lines should just touch the stitched border line as shown. Remove basting stitches just before placing the patterns. As you roll the forward on the quilt you can also add the inner blocks 3406A. When these are done you can either stitch a straight line in the first border or a narrow sash pattern. I used 2797A, a point to point sash pattern. Notice that the points to click for the sash pattern is where your basting lines were.


Once the entire center and 1st border are quilted you can add your outer border patterns. They are block patterns. Set all 4 corners 1st. 3406D and 3406D-2 if you have thin batting or 3406D-3,4 &5 if you are using thicker batting.

Next, use boundary to draw a rectangle (See red lines below) and fit remaining border patterns 3406E. They should line up with the tips of the star blocks as shown by red arrows.


Voila! That's it! I washed and blocked mine before adding my binding. Happy Quilting. Tammy
Would love to see photos of your finished quilts!
Click here to purchase the Feathered Elegance Whole Cloth Set.


Comments